Having rabbits as a pet is quite easy, since they take very little to eat and can groom themselves. On the other hand, they can be a viable meat source though they are not as popular as chicken. If you ever think of raising rabbits; then you’ll need to take a look at these DIY rabbit hutch plans & ideas, as your very first start.
Rabbits won’t require a lot of space. Also, they need to be free few times a week so that the size of the cage you’ll use won’t really matter. Subsequently, you have to watch for their safety when you let them out of the cage. Especially, when you own any other animal at home that are bigger than rabbits.
As a start, read this basic guide about the proper housing size.
Source Pinterest
After you’re sure you’ve got the space and materials, let’s move on to the hutch plans you can choose.
Easy Outdoor DIY Rabbit Hutch Plans & Ideas
Source Pinterest
This first one is a very basic hutch; simply put a box on legs. The sides are made of wire so that it allows you to see in and let the rabbits see out. It’ll also make feeding and cleaning the hutches much easier.
But if you are looking for fancier plans, you can try this one.
A triangular wooden hutch is perfect when you want to keep your rabbits separate. The A-frame structure makes the design very unique. Moreover, it’s easy to clean and maintain.
You might also like this one better.
Source PinterestSource Pinterest
Or maybe a hutch like this.
Source PinterestSource Pinterest
They’ll keep several rabbits inside so it can be more efficient for you to feed them.
Furthermore, you may see the other outdoor hutch ideas that’ll be perfect for your need.
Indoor DIY Hutch Plans & Ideas Out of Upcycled Furniture
Particularly, if you prefer having rabbits as a pet, then indoor hutch will be perfect for you. To make one by yourself, you’d better see if you can use the old furniture you have at home for your bunnies.
All you need to do is to modify your furniture into a hutch with wire window. It could be from a TV stand, cabinet, dresser, even an entertainment center.
This step by step diy project is about diy playhouse plans. I have designed this small playhouse with front porch so you can get the job done with a small budget and with basic tools. This playhouse has been optimized so you can use the littlest amount of materials and save time. This playhouse is the perfect addition to any backyard. Take a look over the rest of my woodworking plans, if you want to get more building inspiration.
When buying the lumber, you should select the planks with great care, making sure they are straight and without any visible flaws (cracks, knots, twists, decay). Investing in cedar or other weather resistant lumber is a good idea, as it will pay off on the long run. Use a spirit level to plumb and align the components, before inserting the galvanized screws, otherwise the project won’t have a symmetrical look. If you have all the materials and tools required for the project, you could get the job done in about a day.
Projects made from these plans
DIY Playhouse Plans
Building a playhouse
How to build a playhouse
.*
The first step of the project is to build the floor frame for the playhouse. Cut the joists at the right dimensions and then lay them on a level surface. Align the edges flush and make sure the corners are square. Drill pilot holes and insert 3 1/2″ screws to lock the joists together tightly. Place the joists every 16″ on center.
Fitting the skids
Fit the 4×4 skids under the frame, as shown in the diagram. Use rafter ties to lock the skids to the frame tightly.
End decking board
Make cuts to a decking board, so you can fit it into place tightly. Use a circular saw to make the notch, so you can fit it around the porch posts.
Fitting the posts
Fit the posts to the frame and plumb them with a spirit level. Drill pilot holes through the frame and insert 3 1/2″ lag screws into the posts.
Fitting the decking
Fit the 5/4″ decking boards to the floor of the frame. Place a nail between the boards, drill pilot holes and insert 2 1/2″ screws to lock them into place tightly.
Side walls – frame
Building the side walls for the playhouse is a straight forward process. Cut the components at the right dimensions and then lay them on a level surface. Drill pilot holes through the plates and insert 3 1/2″ screws into the studs. Align the edges flush and make sure the corners are square. Frame large window openings to the side walls. You can adjust the size of the window openings to suit your needs.
Front wall – Frame
Build the front wall for the playhouse from 2×4 lumber. Drill pilot holes through the plates and insert 3 1/2″ screws into the studs. Make sure the corners are square and frame a window opening, as well as a door opening.
Back wall – frame
Use 2×4 lumber for the back wall frame. Cut the studs and the plates at the right dimensions. Drill pilot holes through the plates and insert 3 1/2″ screws into the studs. Make sure the corners are square and align the edges flush.
Building the frame of the playhouse
Fit the wall frames to the base of the playhouse. Align the edges flush and plumb them with a spirit level. Drill pilot holes through the bottom plates of the walls and insert 3 1/2″ screws into the floor. Moreover, you need to lock the adjacent walls together tightly with 2 1/2″ screws, after drilling pilot holes.
Front wall – siding
Use 1/2″ plywood for the exterior walls. Mark the cut lines on the sheets and then make the window openings and the door opening. Align the edges flush and then insert 6-8d nails every 8″ along the framing.
Side walls – exterior
Fit the panels to the sides of the playhouse, as well. Make the window opening with a saw. Align the edges flush and insert 6-8d nails, every 8″ along the framing.
Back wall – siding
Fit the panel to the back wall, as well.
You need to take a look over PART 2 and PART 3 of the playhouse, so you learn how to build the gable roof and how to build the porch rails.
DIY Playhouse Plans – Front view
This playhouse has a beautiful appearance and it features a small front porch. This playhouse is super easy to build by anyone with basic skills and tools. If you are a weekend DIY-er, this project will be a nice change of pace and an opportunity to step up your game.
This woodworking project was about diy playhouse plans free. If you want to see more outdoor plans, check out the rest of our step by step projects and follow the instructions to obtain a professional result.
This one. She has a very deep, special place in my heart.
One of my first clients after moving back to the Bay Area, it was love at first consult.
She found me in an online moms group (I think? A Facebook group where I was referred or mentioned?) and although I was “working” for her, it was a fast friendship. We organized a few spaces in their rental home when they were just a family of 3. Then helped get them settled in their brand new home with a new custom master closet, an organized / detached home office, an unpacked / organized kitchen….and then a brand new organized master bathroom was soon to follow.
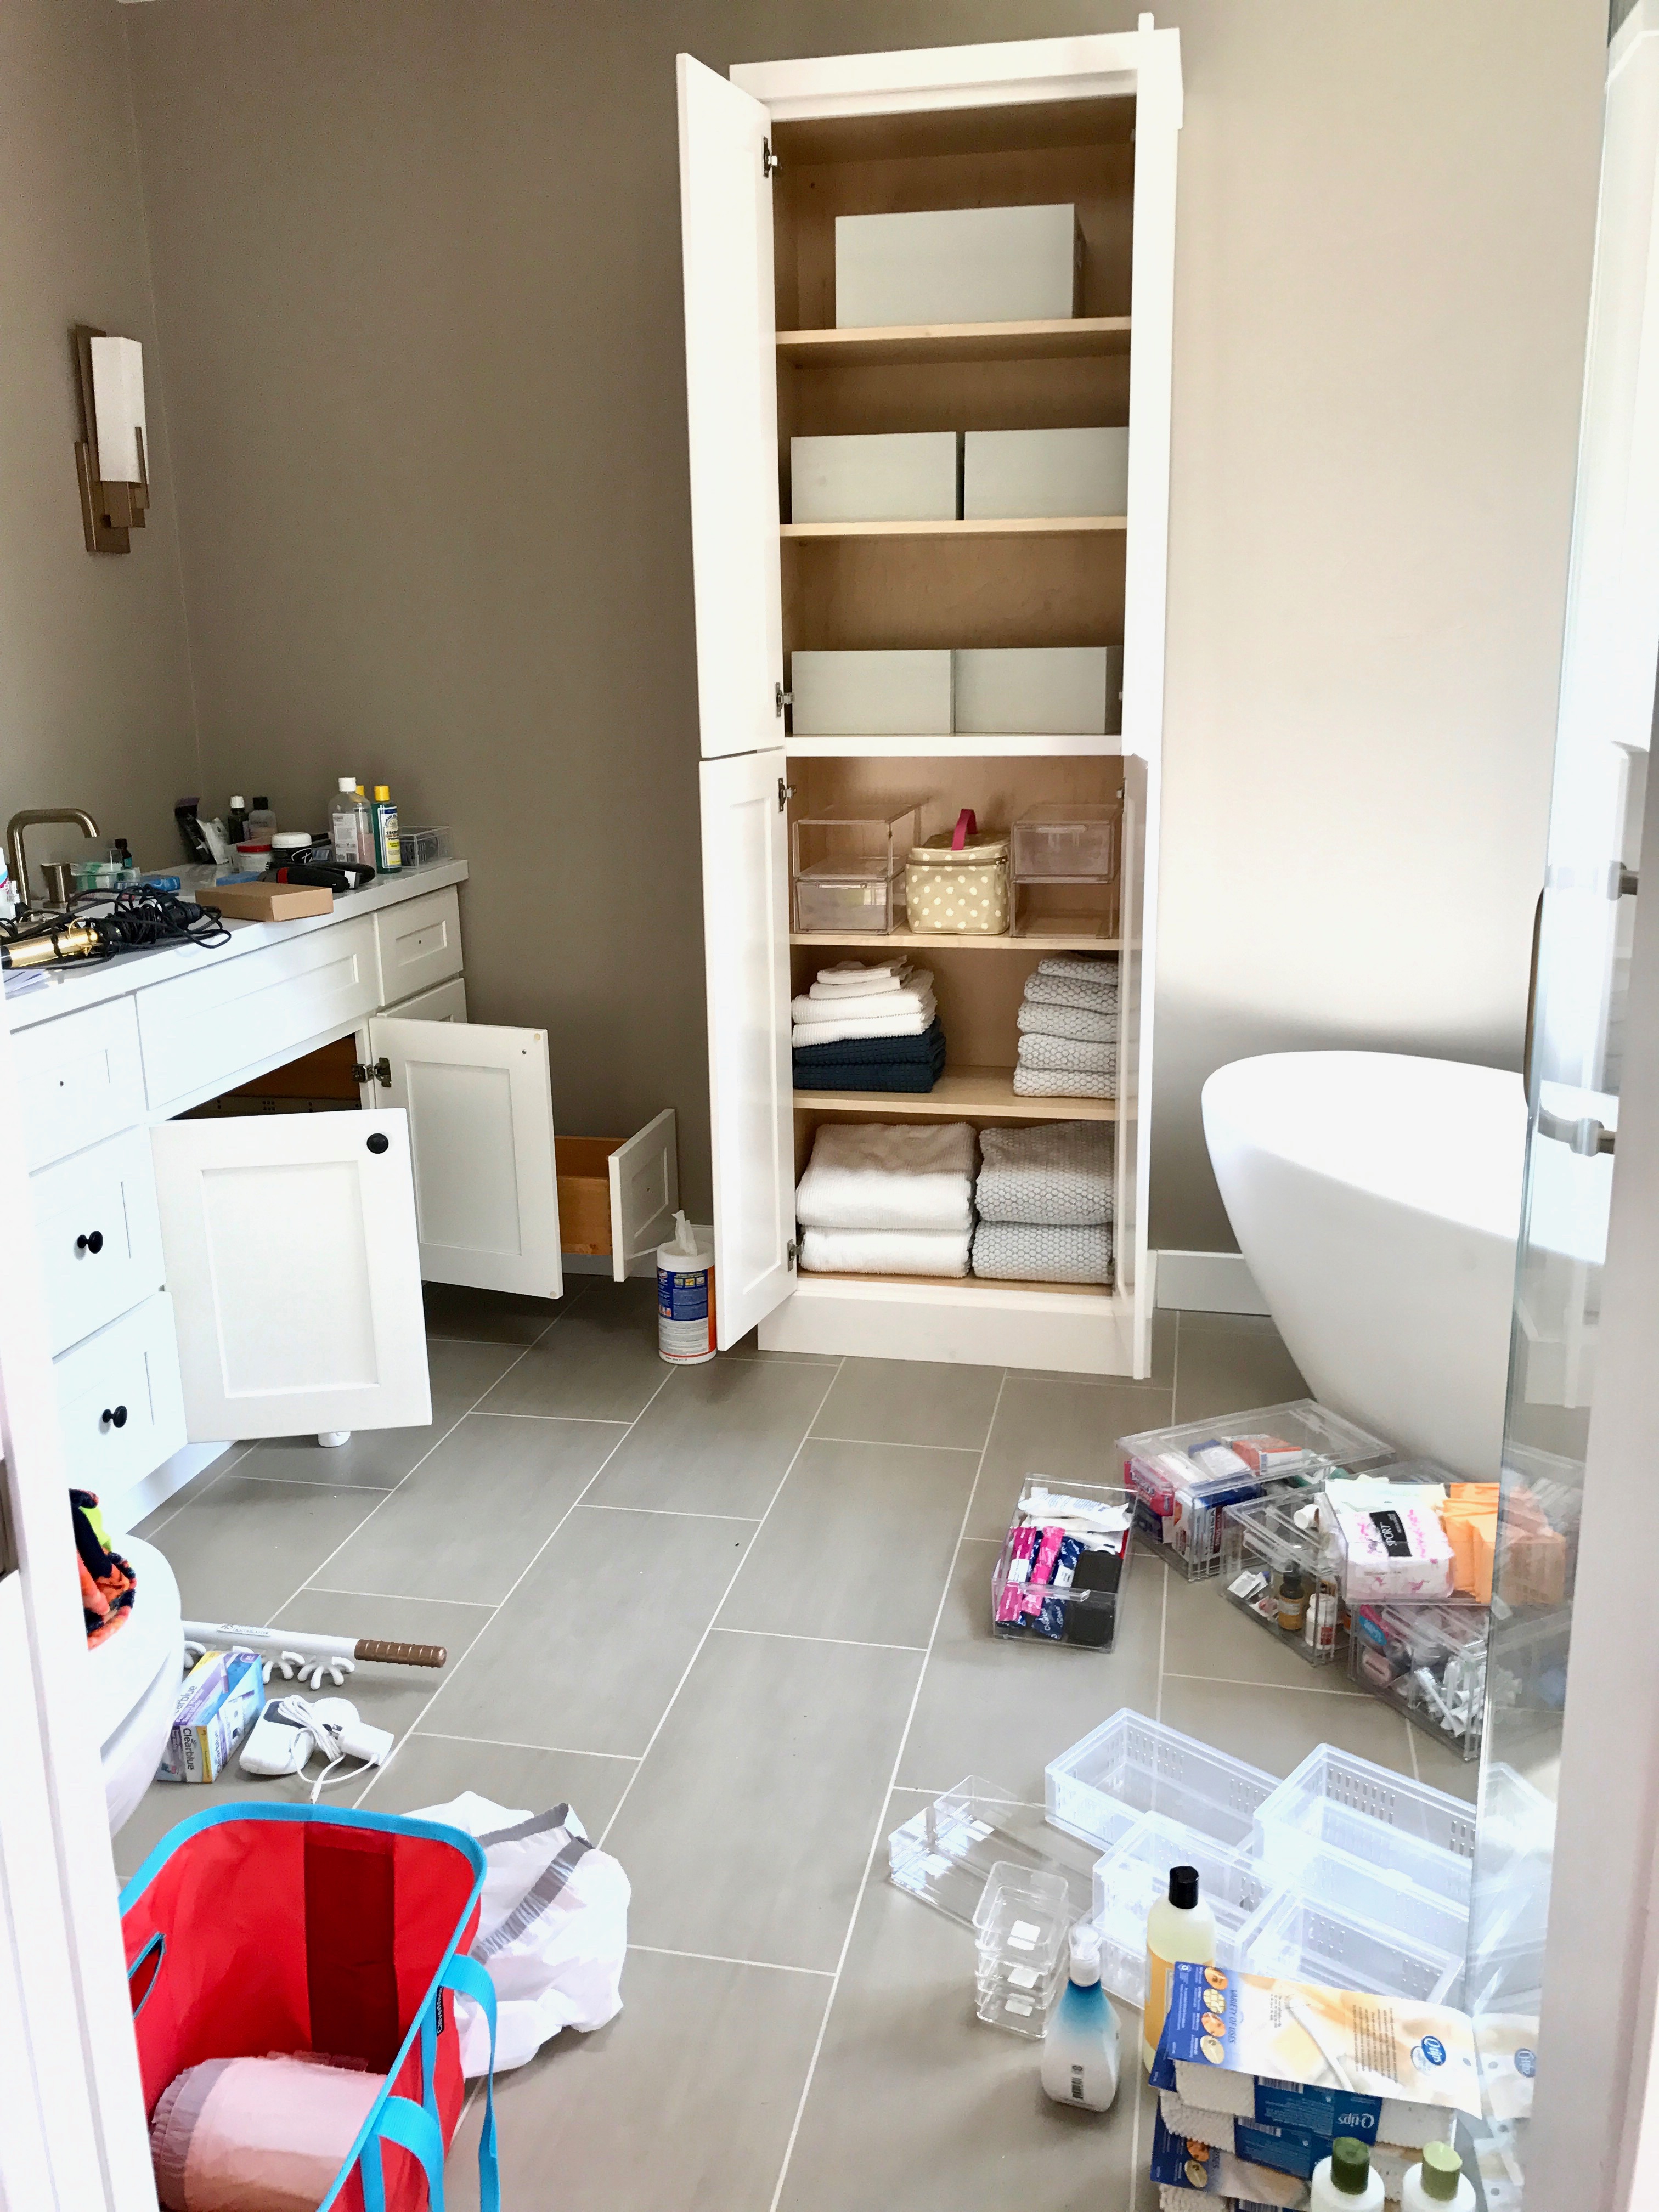
It’s not all glamorous – trust me. Part of the reason they ended up with a new bathroom is due to a pipe leak. It was a costly home repair project when they had nearly just moved in. New homeowners out there reading along will understand what I mean – you’re already writing checks left and right…so to have a major update like this when you weren’t planning on it? Along with a big issue under the front driveway right after move-in as well?
It’s a little painful.
Correction = a lot painful.
Oh, did I mention we went to a Beyonce concert shortly thereafter? Much deserved. For both of us!
Anyway, let’s get to the awesome happily ever after. Specifically THIS beautifully organized master bathroom…
.*
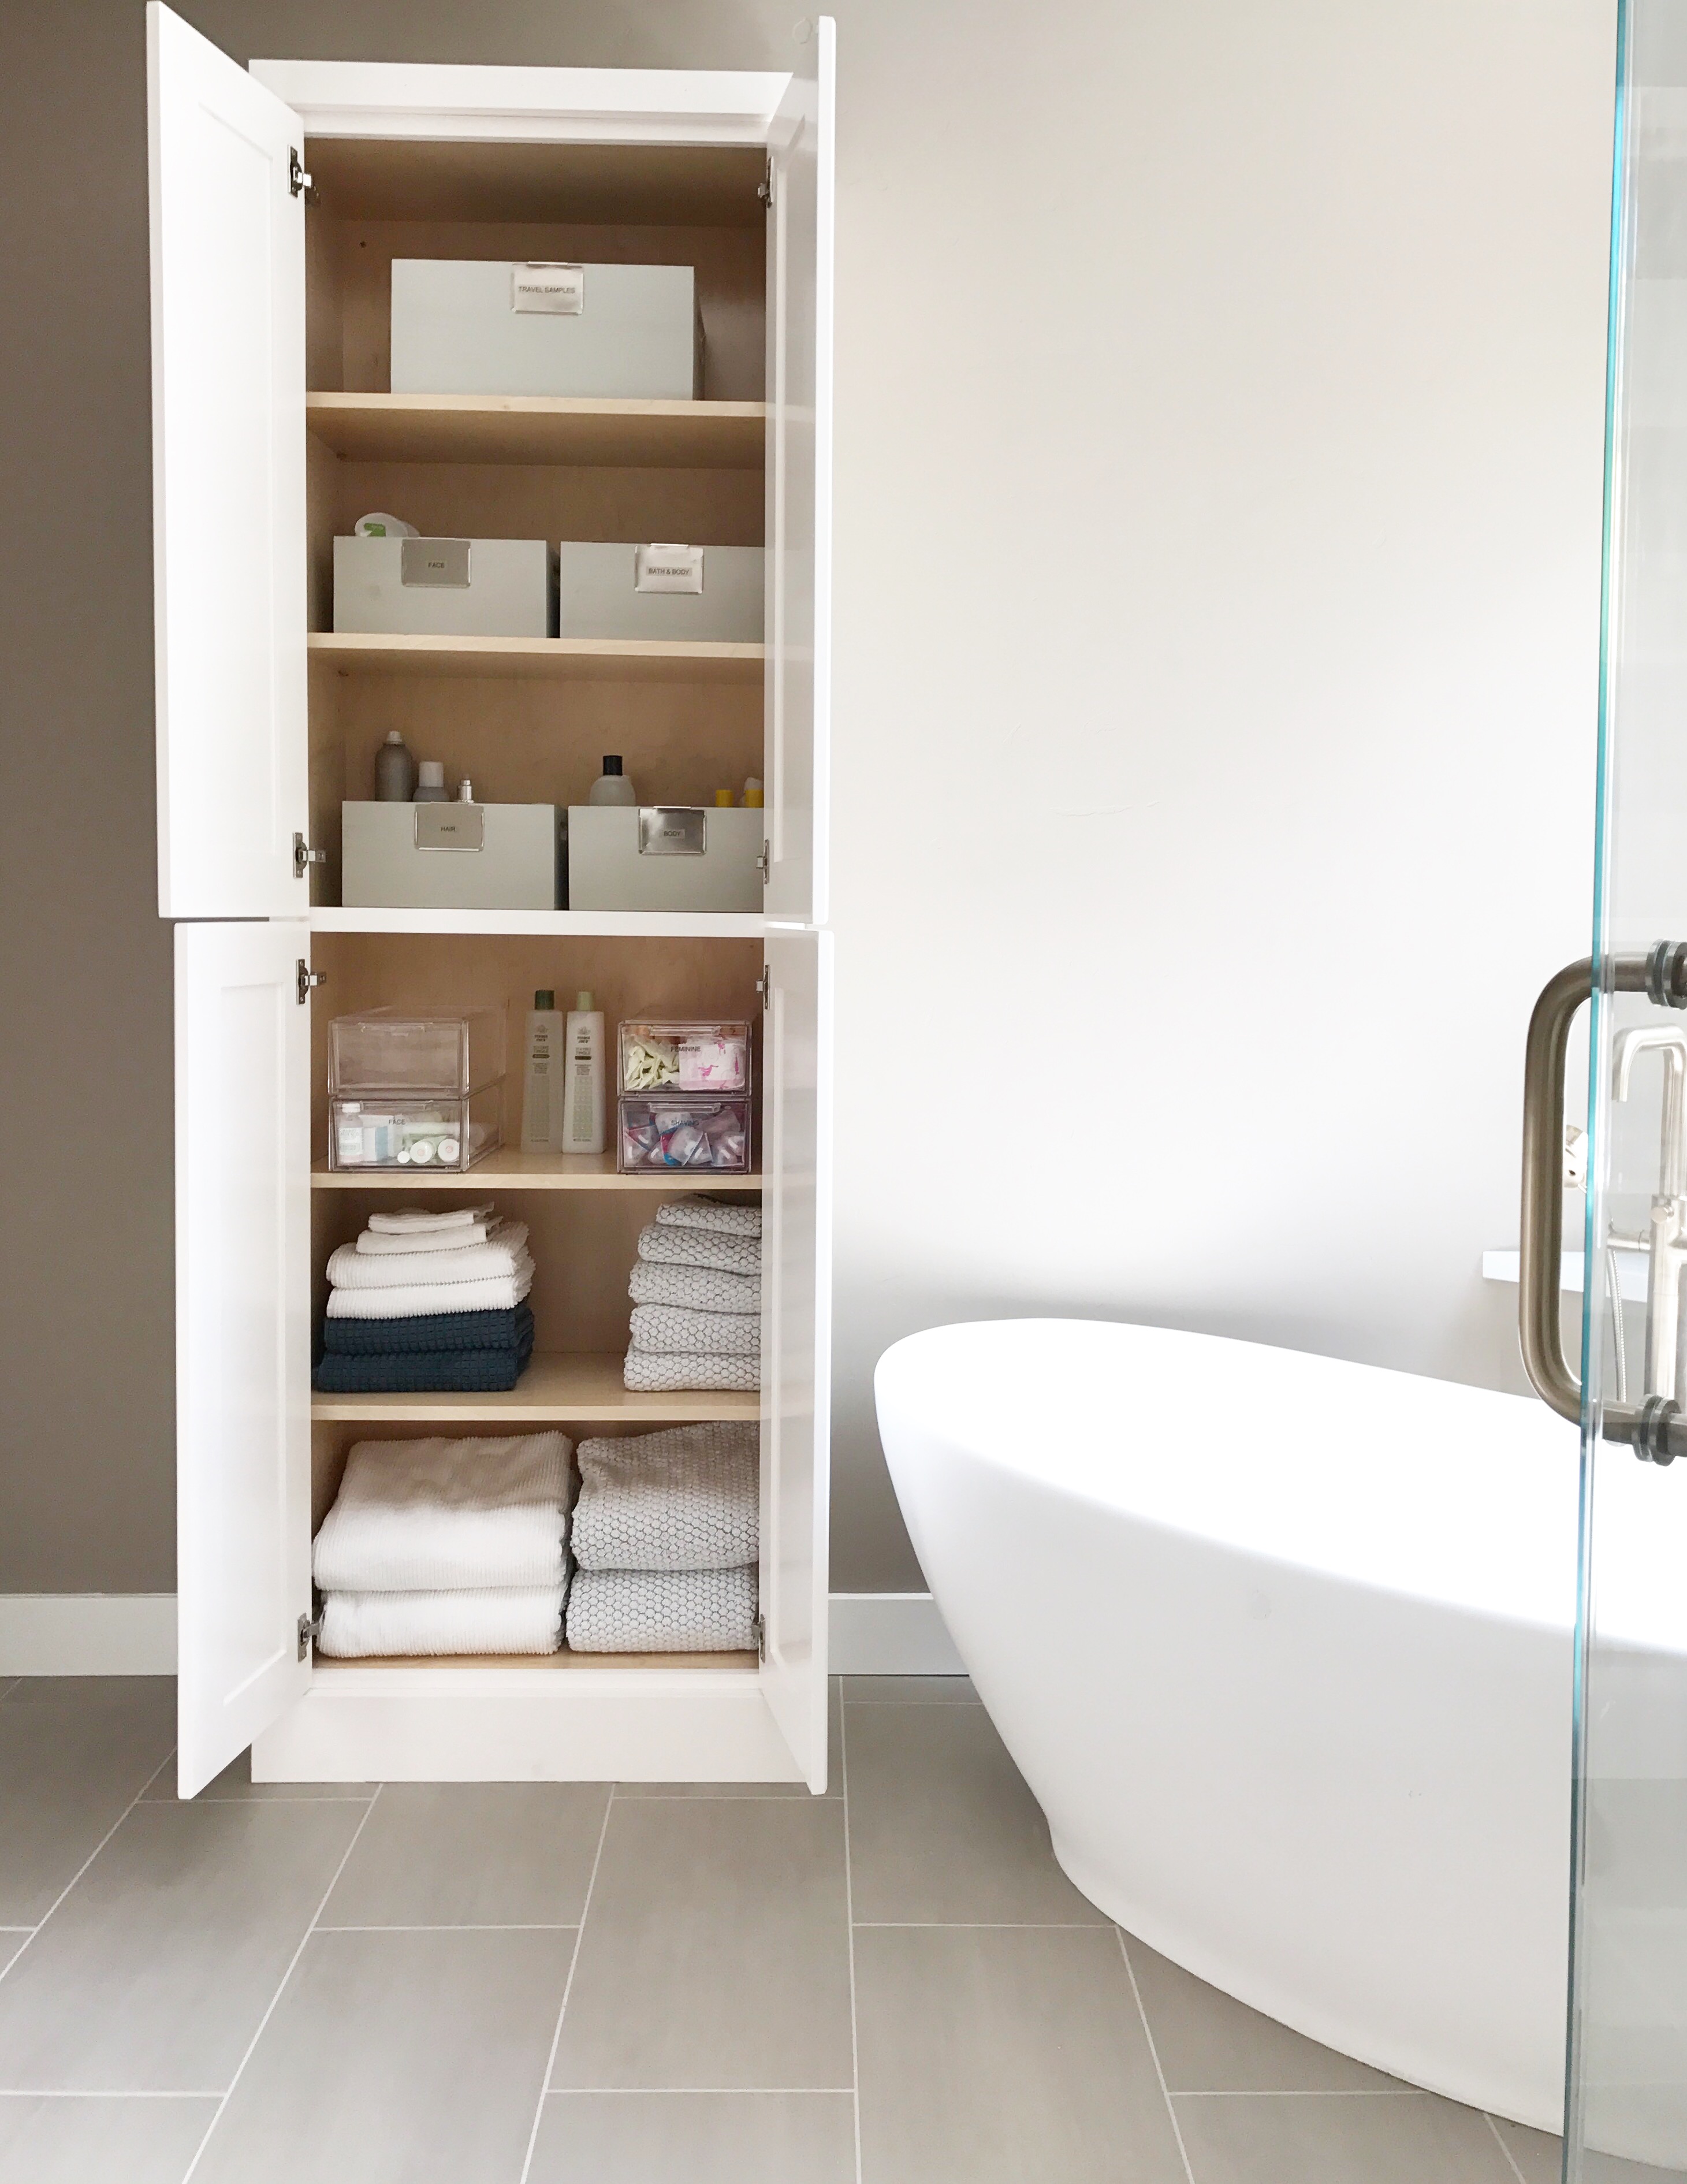
Ugh – I organized this space back in September 2017 (yep, still playing portfolio catch-up) and today am still dreaming about these calming colors. It’s a small but stunning and classic space. When you’re in a pinch making fixture, tile, tub, etc decisions? She nailed it!
And I couldn’t wait to help them get re-settled and re-organized.
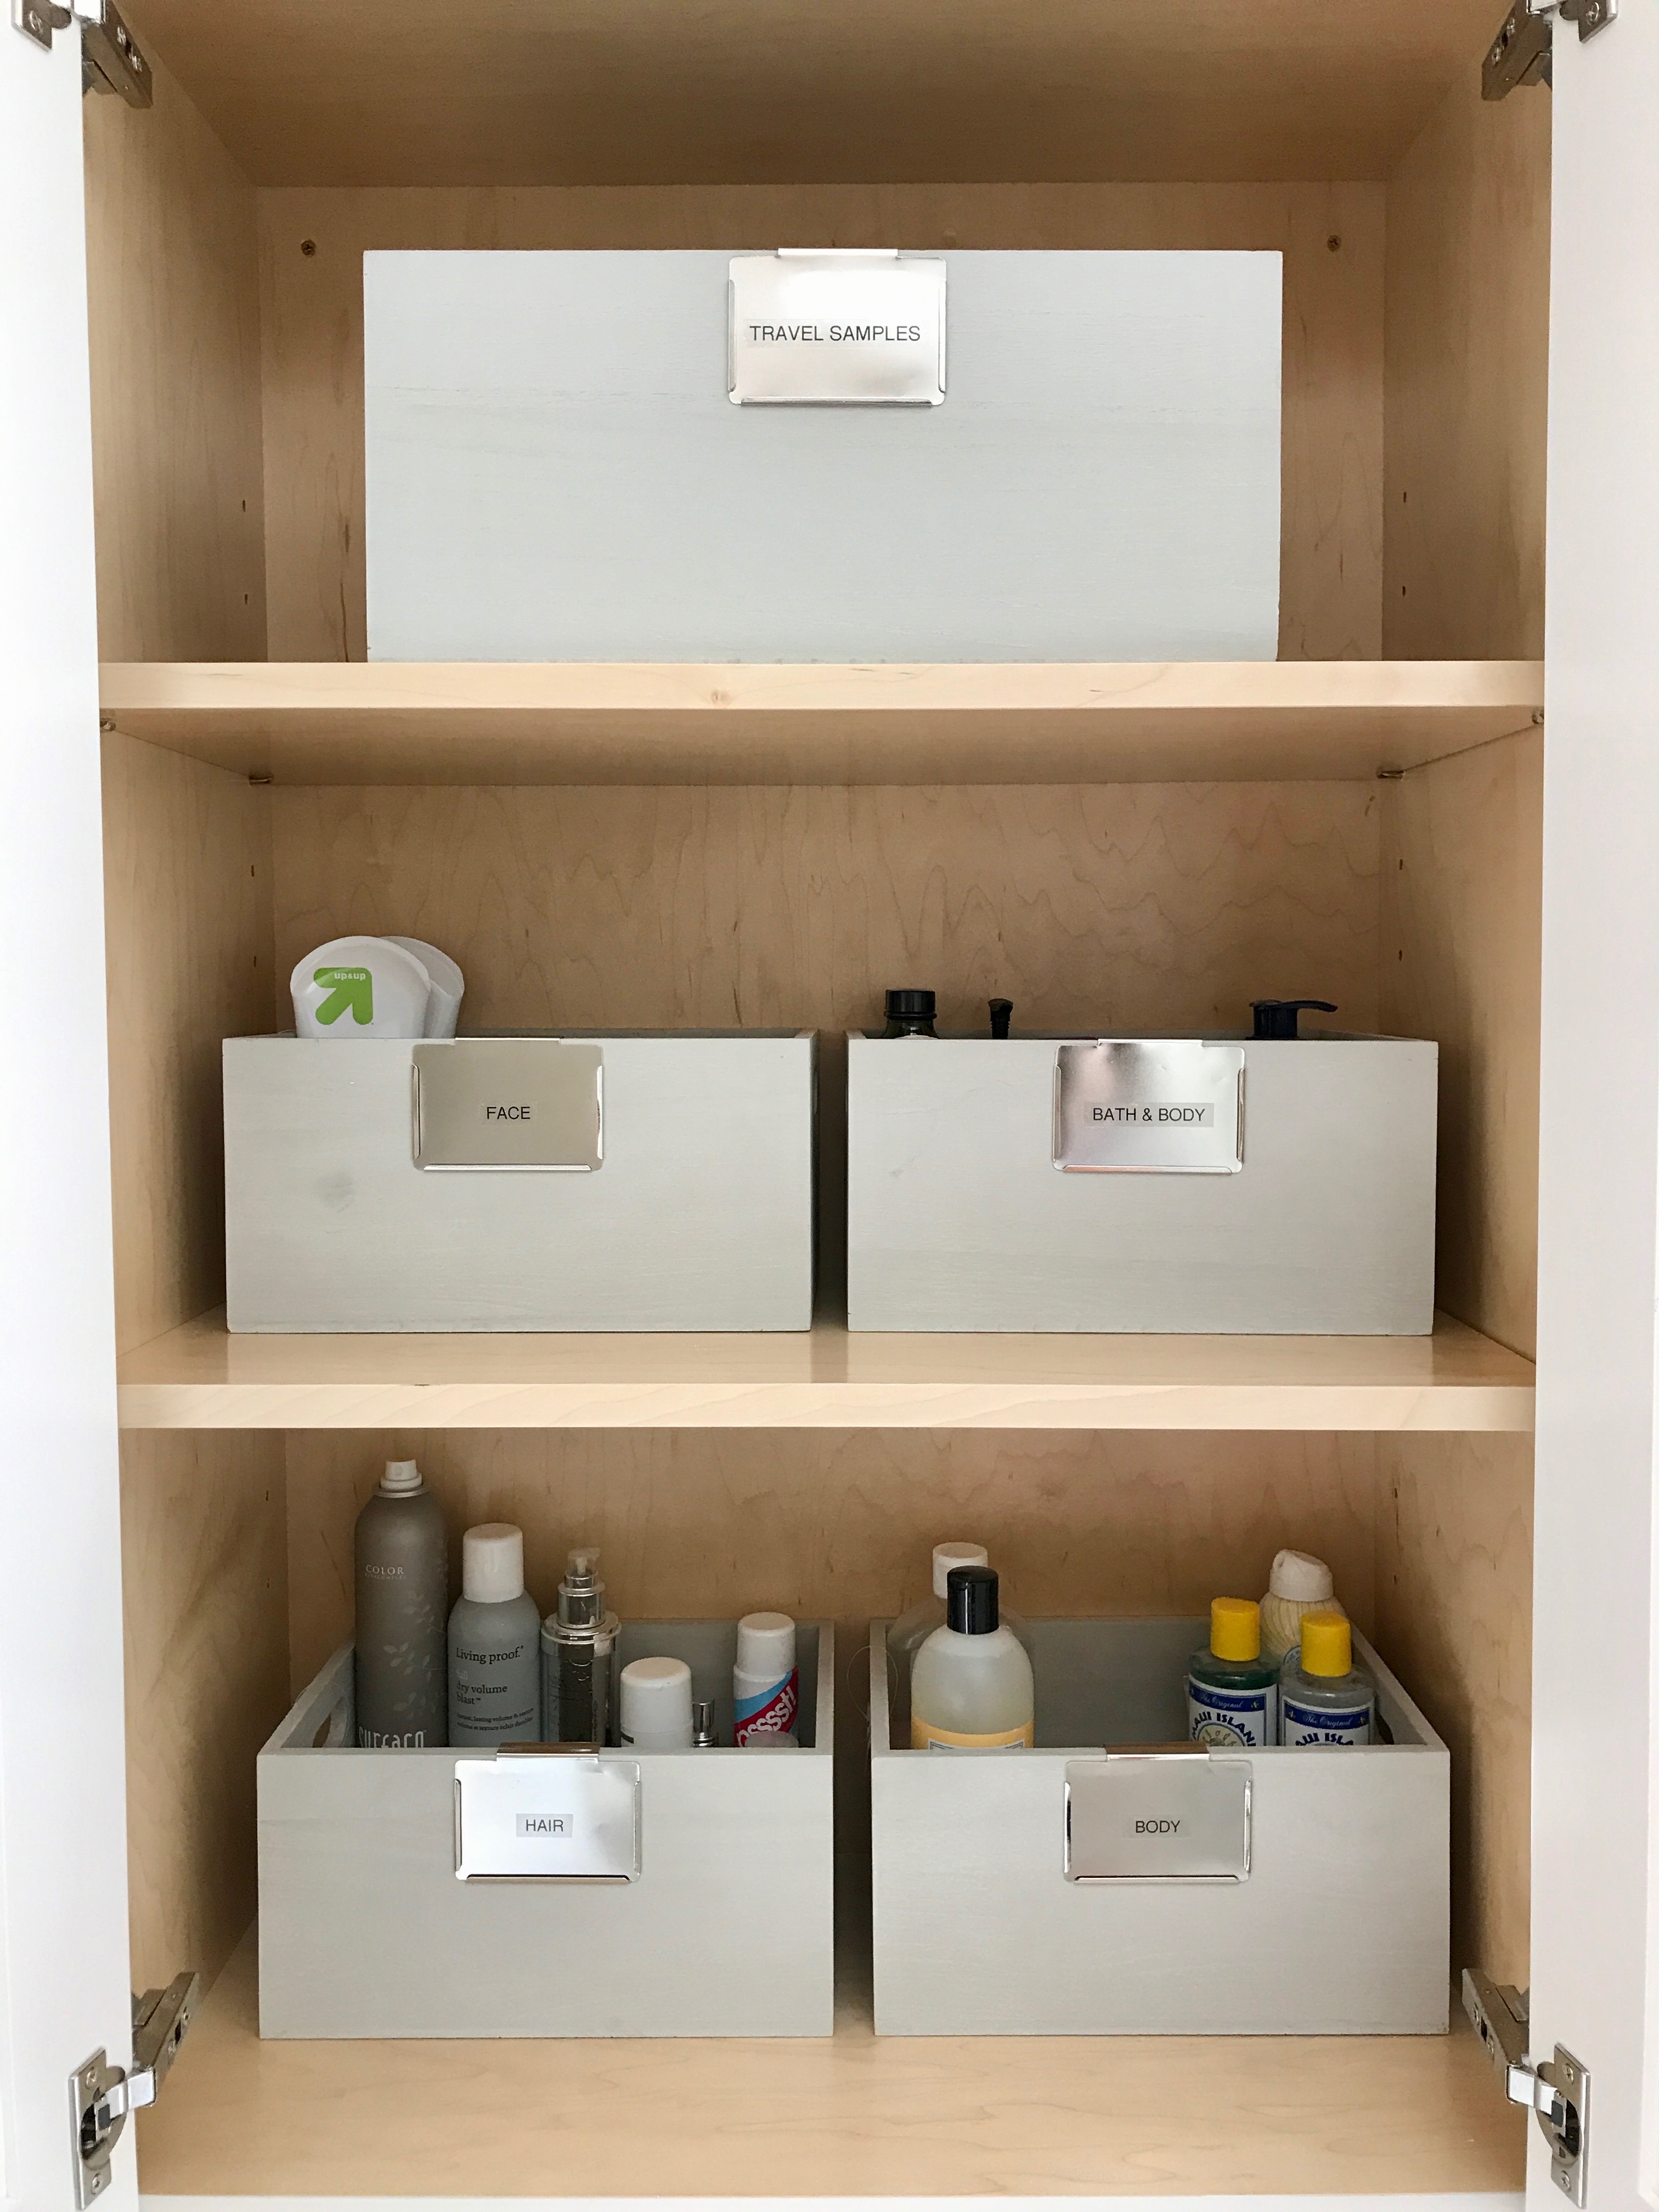
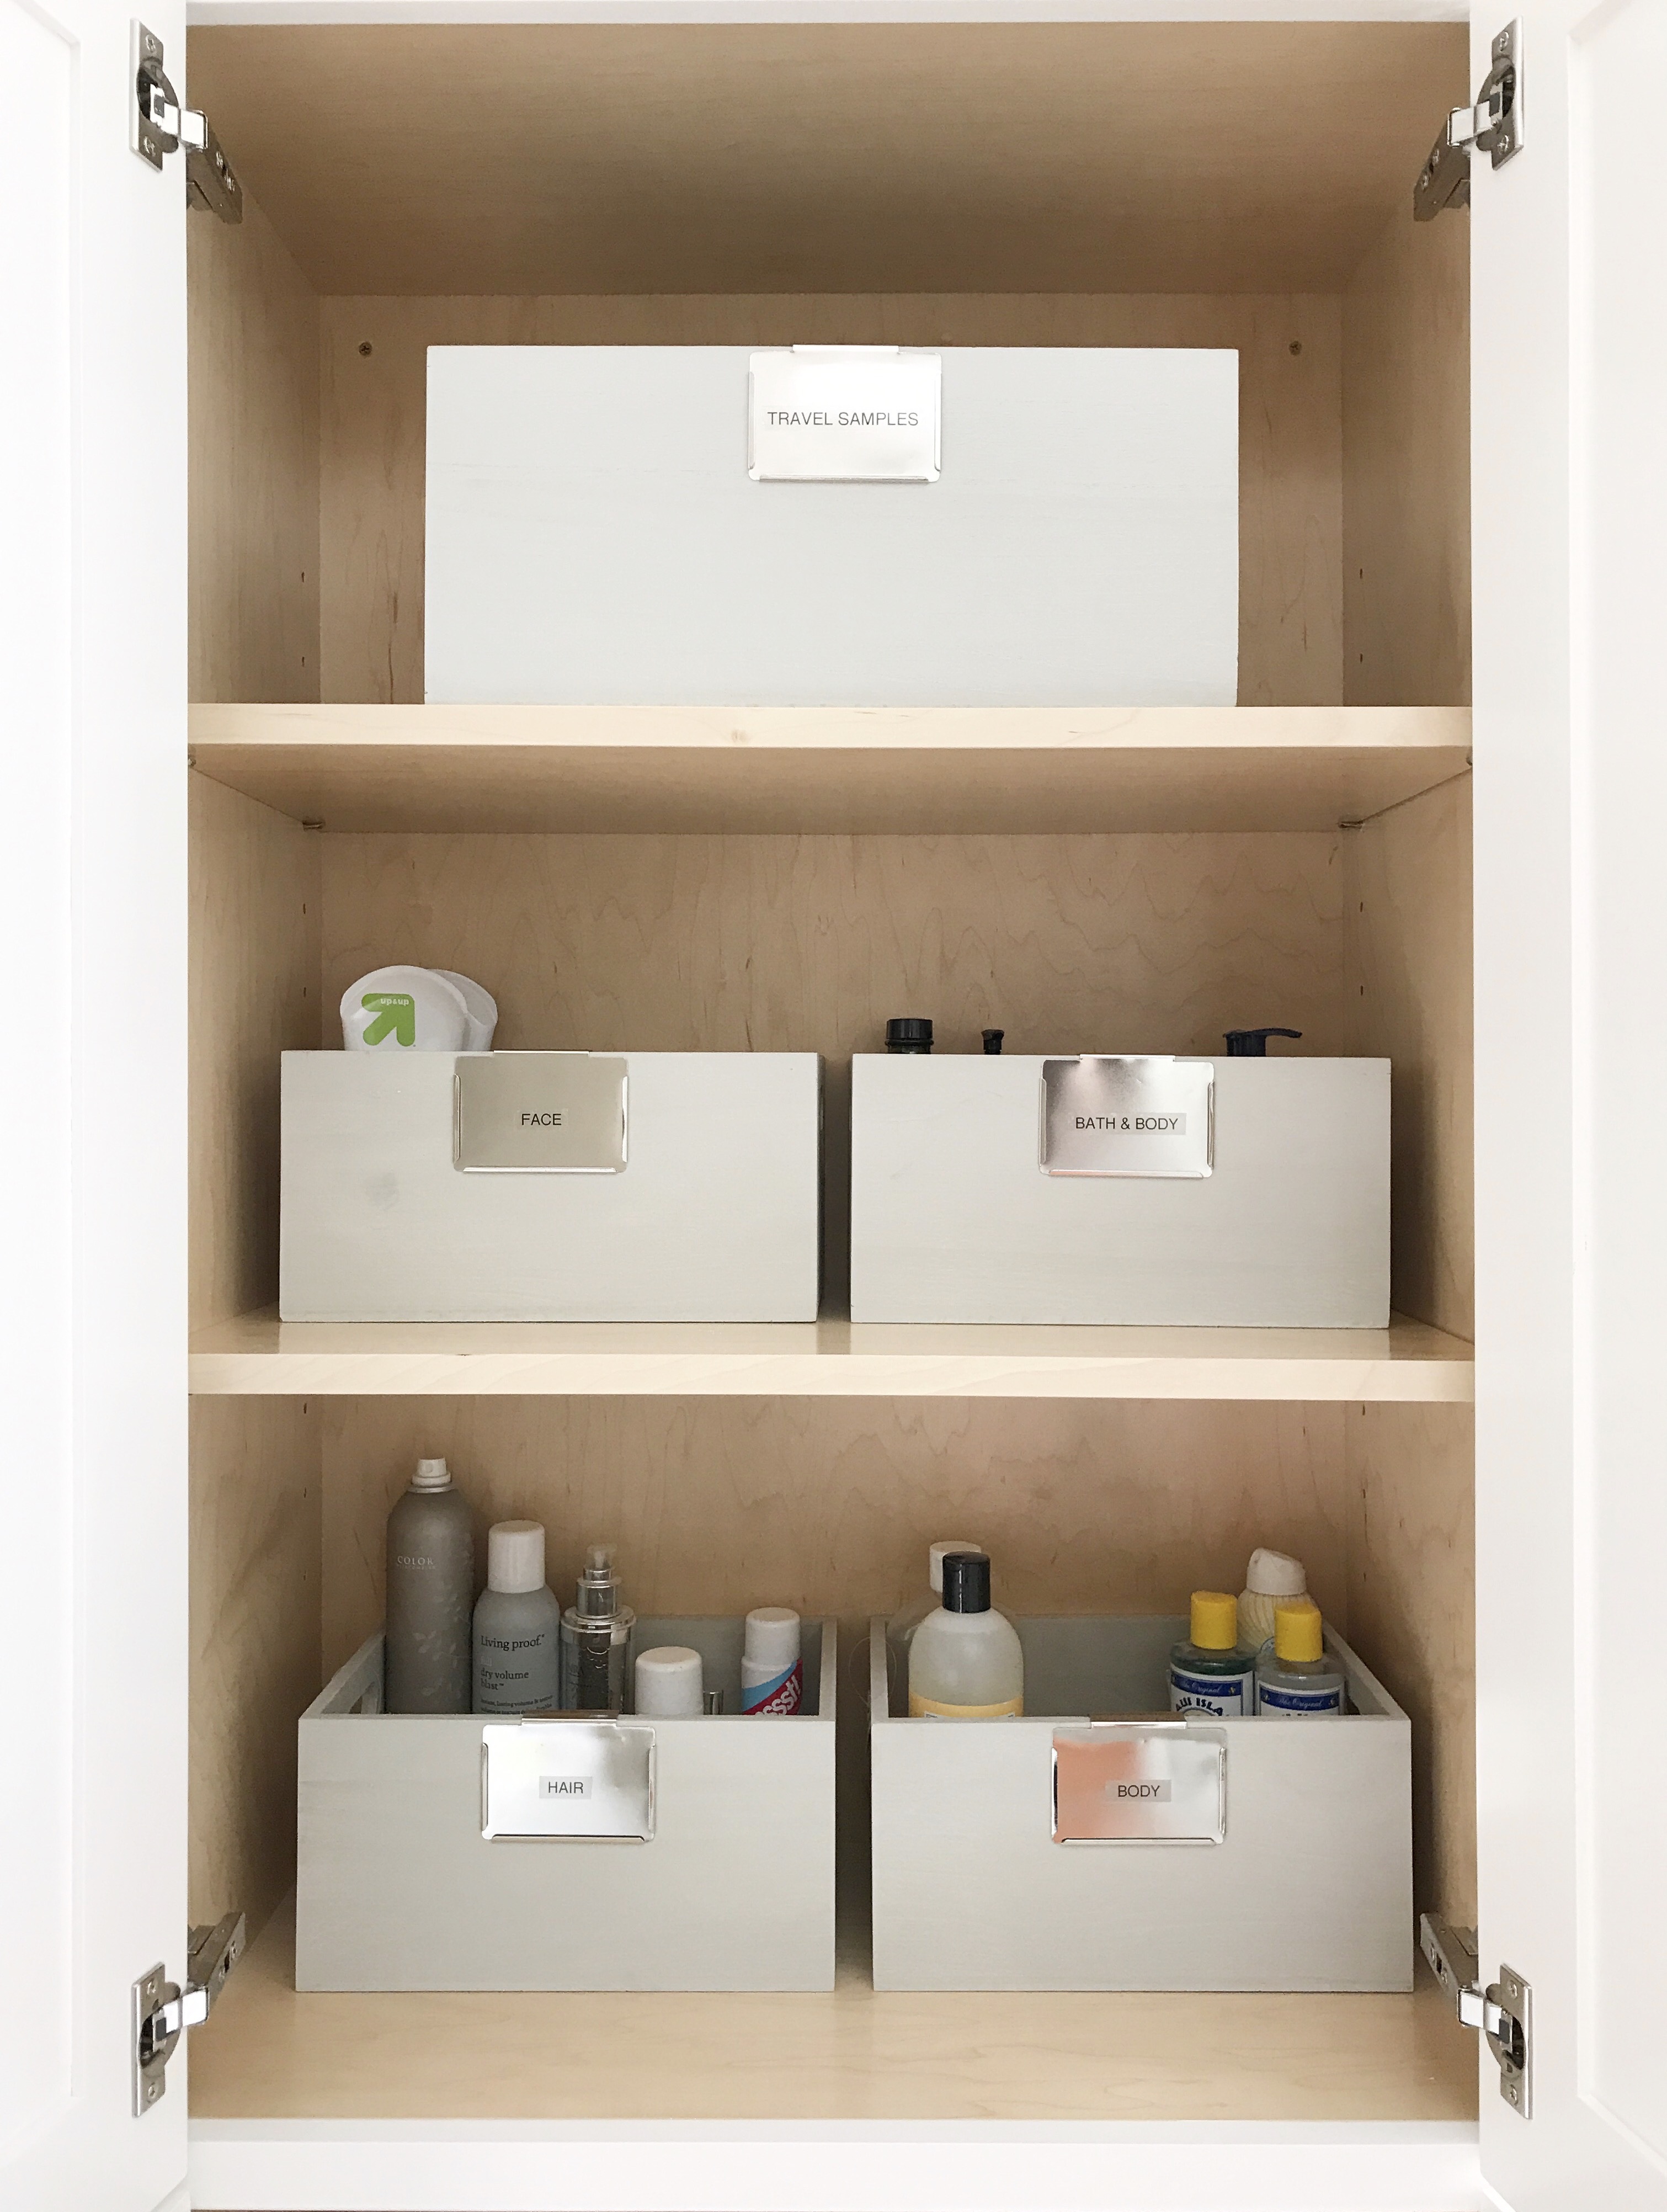
Using simple and minimal containment, I sorted out the contents and had them beautifully organized in just a few hours.
For this cabinet, I wanted to stay in the same calming color tone as the bathroom’s surrounding space…
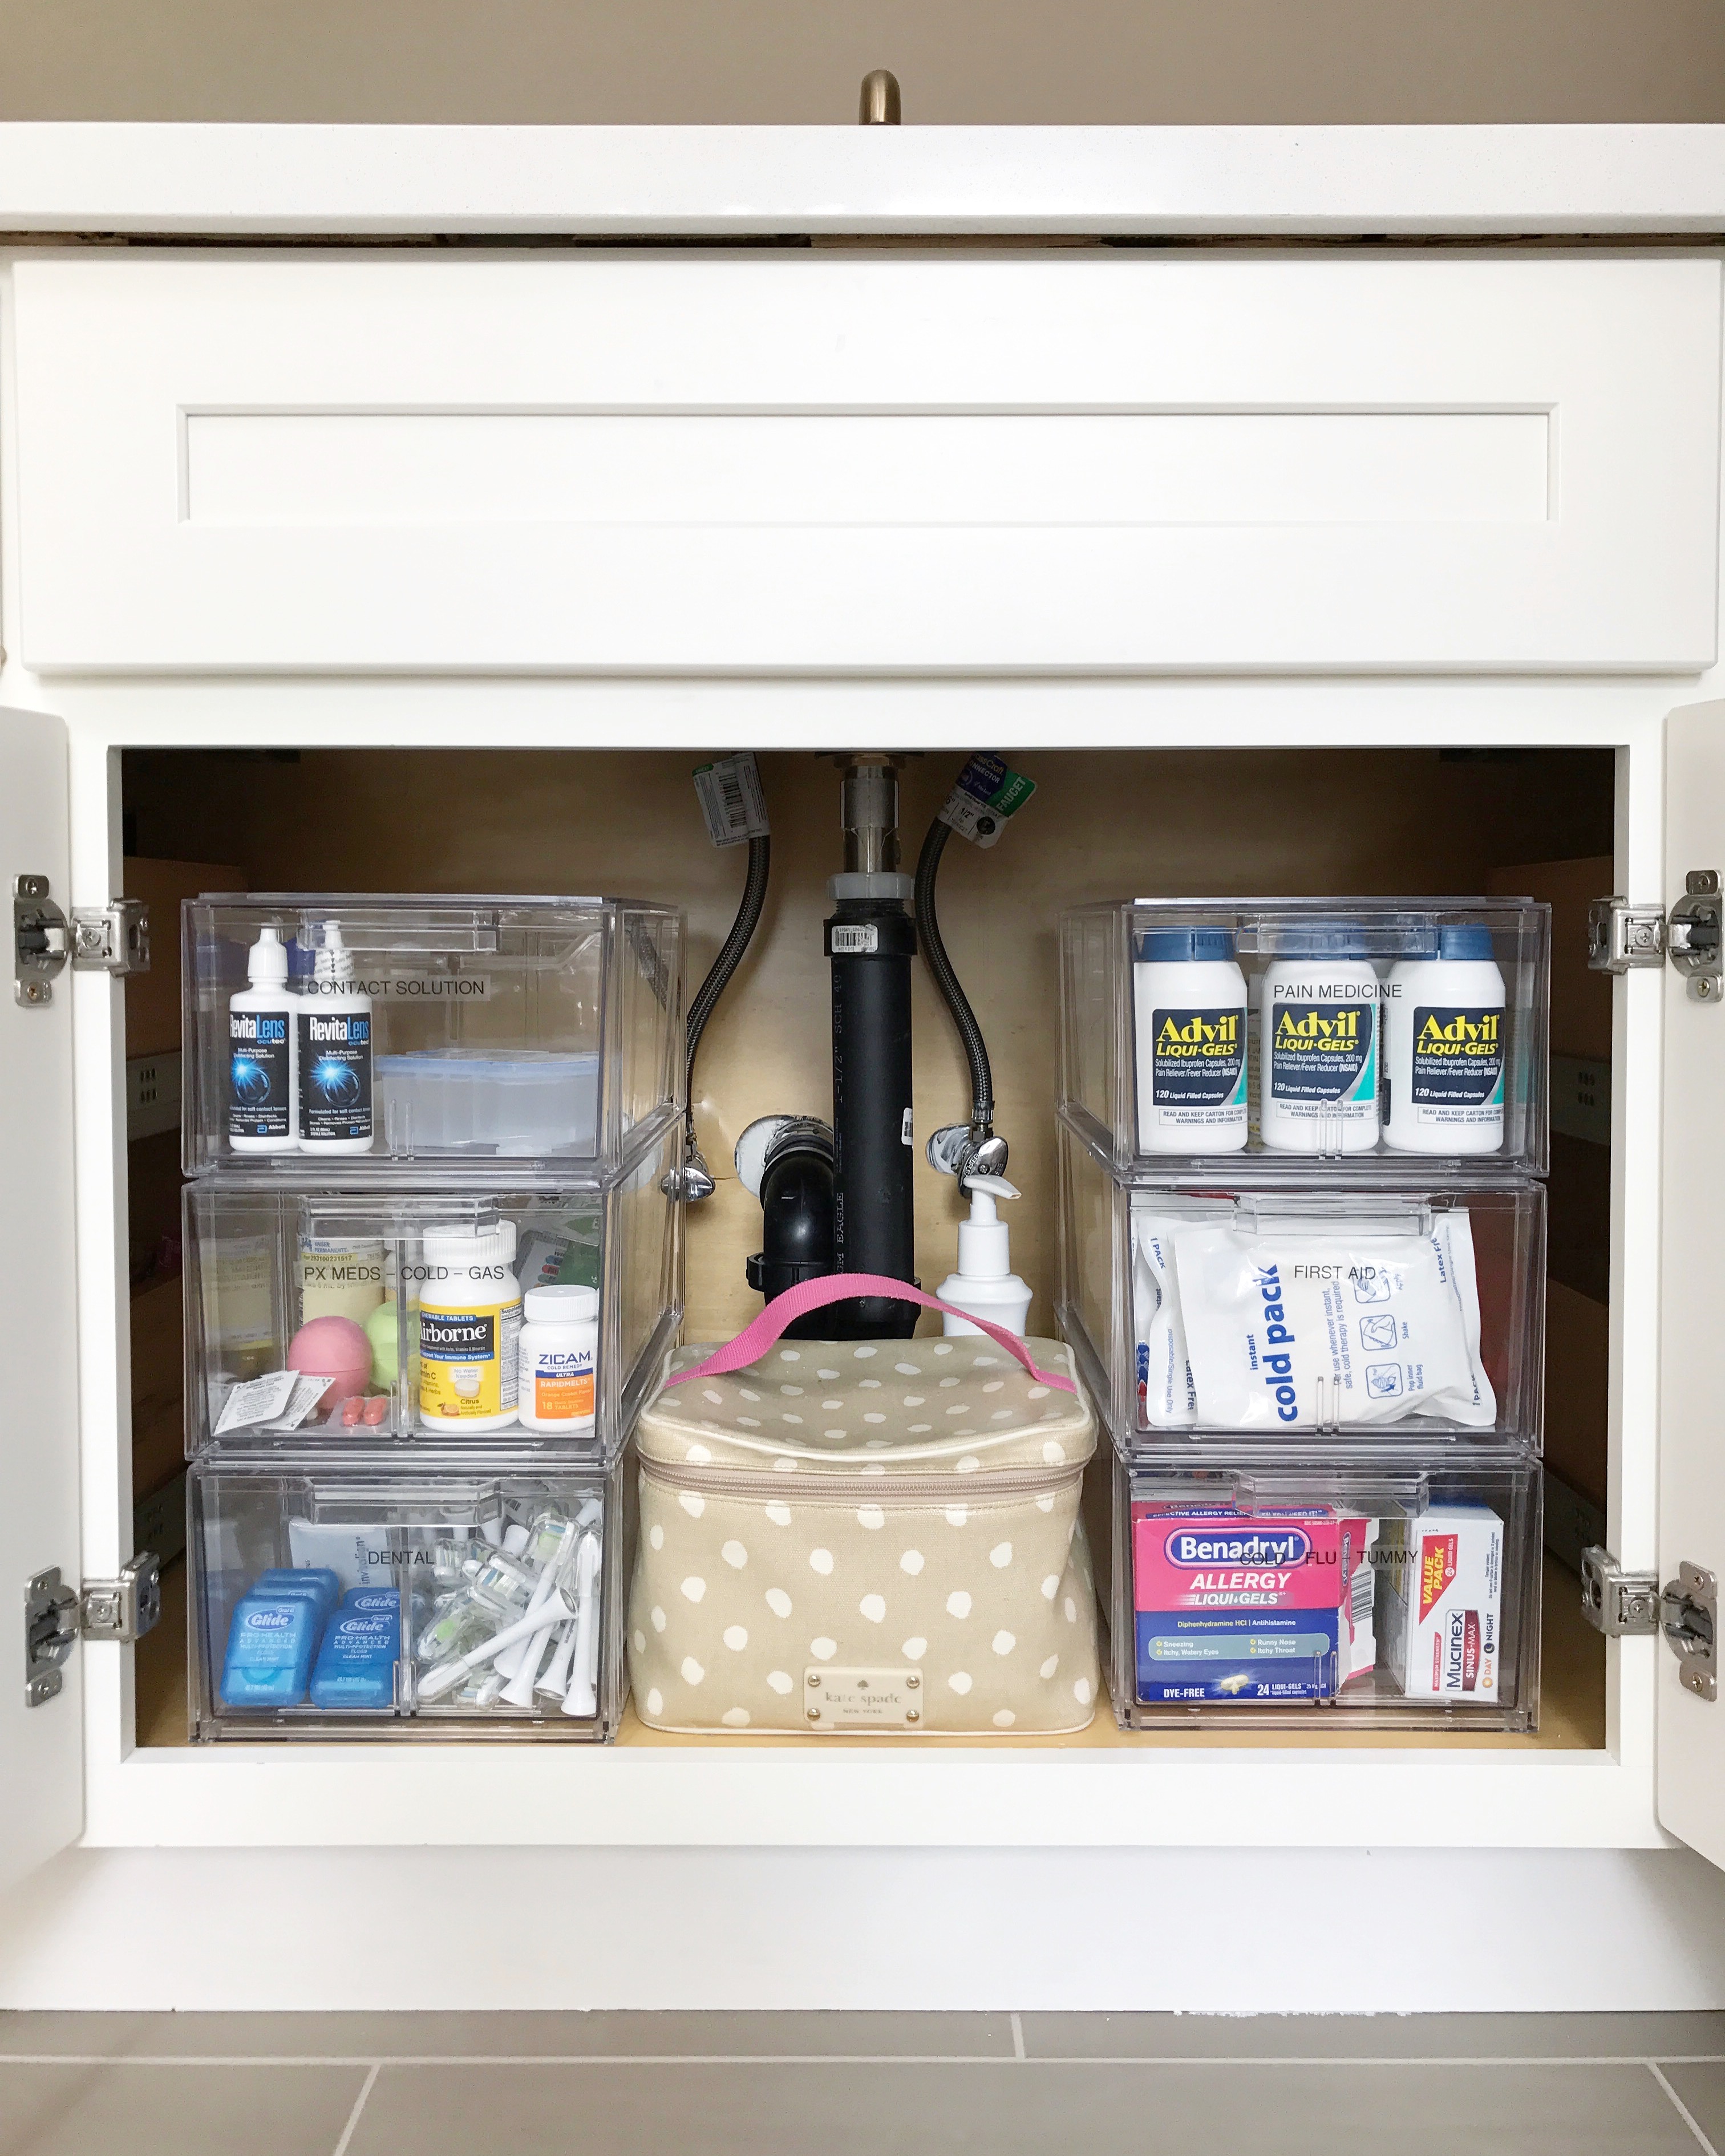
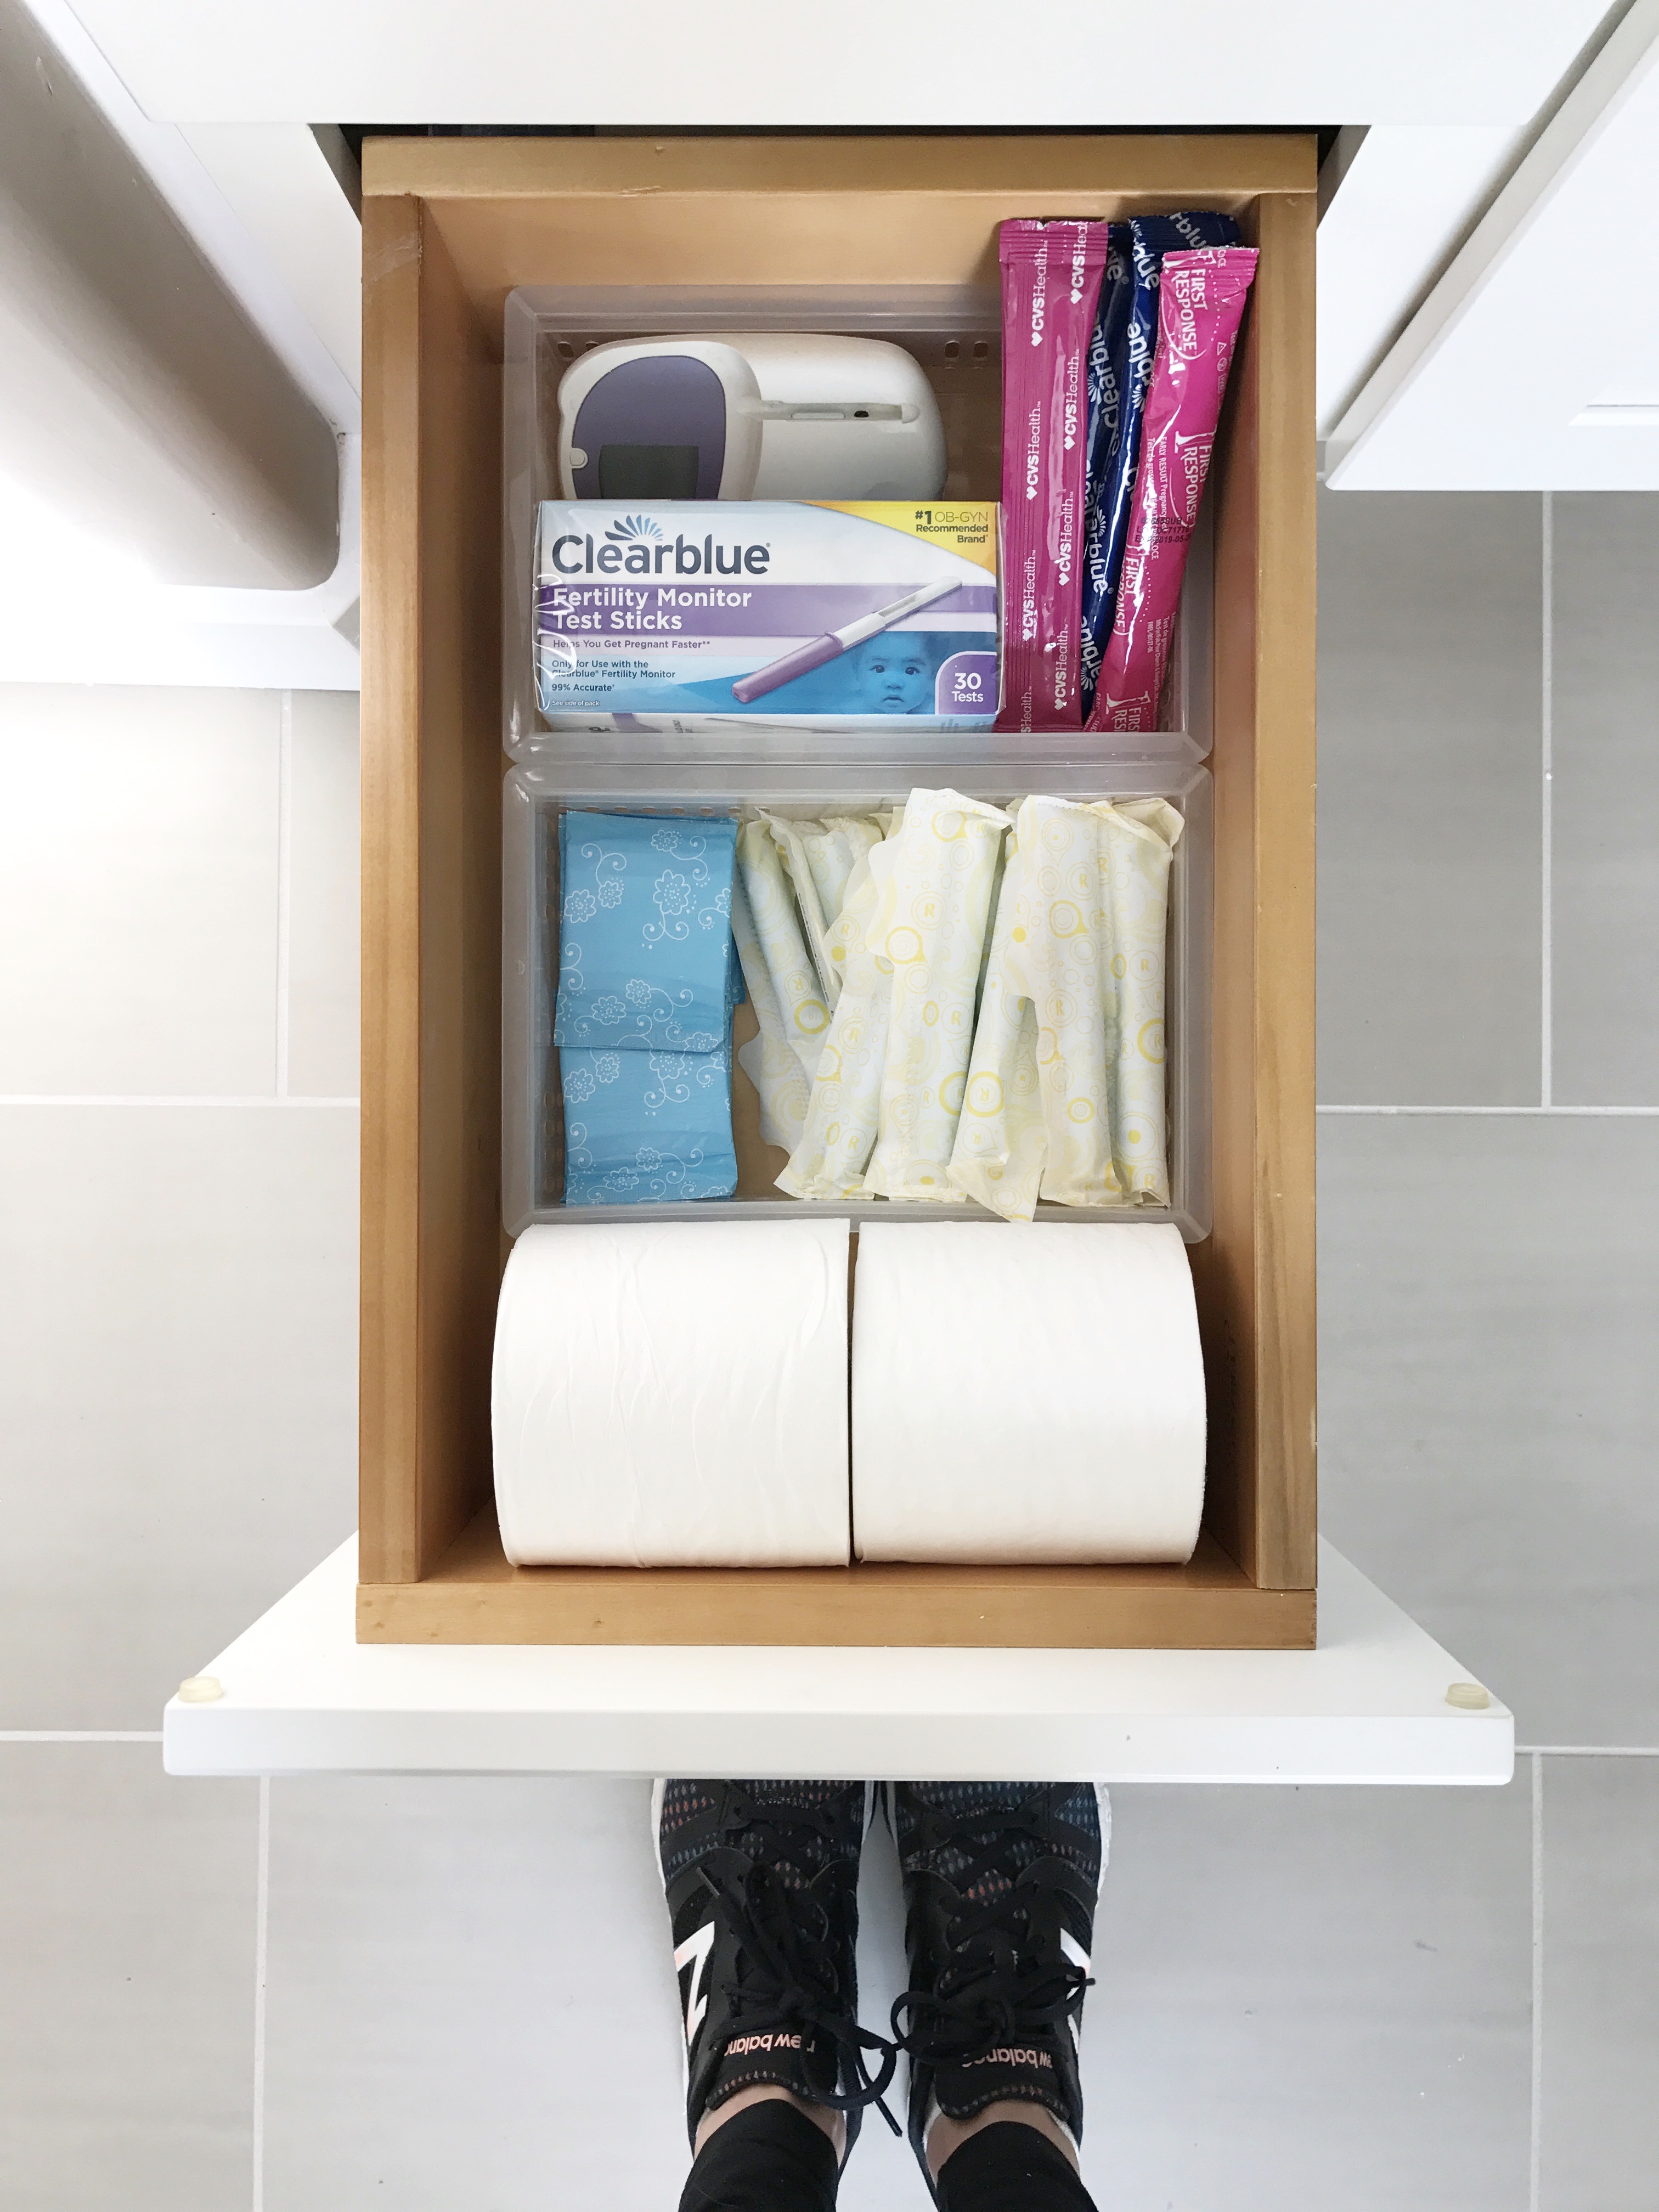
A bathroom wouldn’t be complete without perfectly organized drawers…
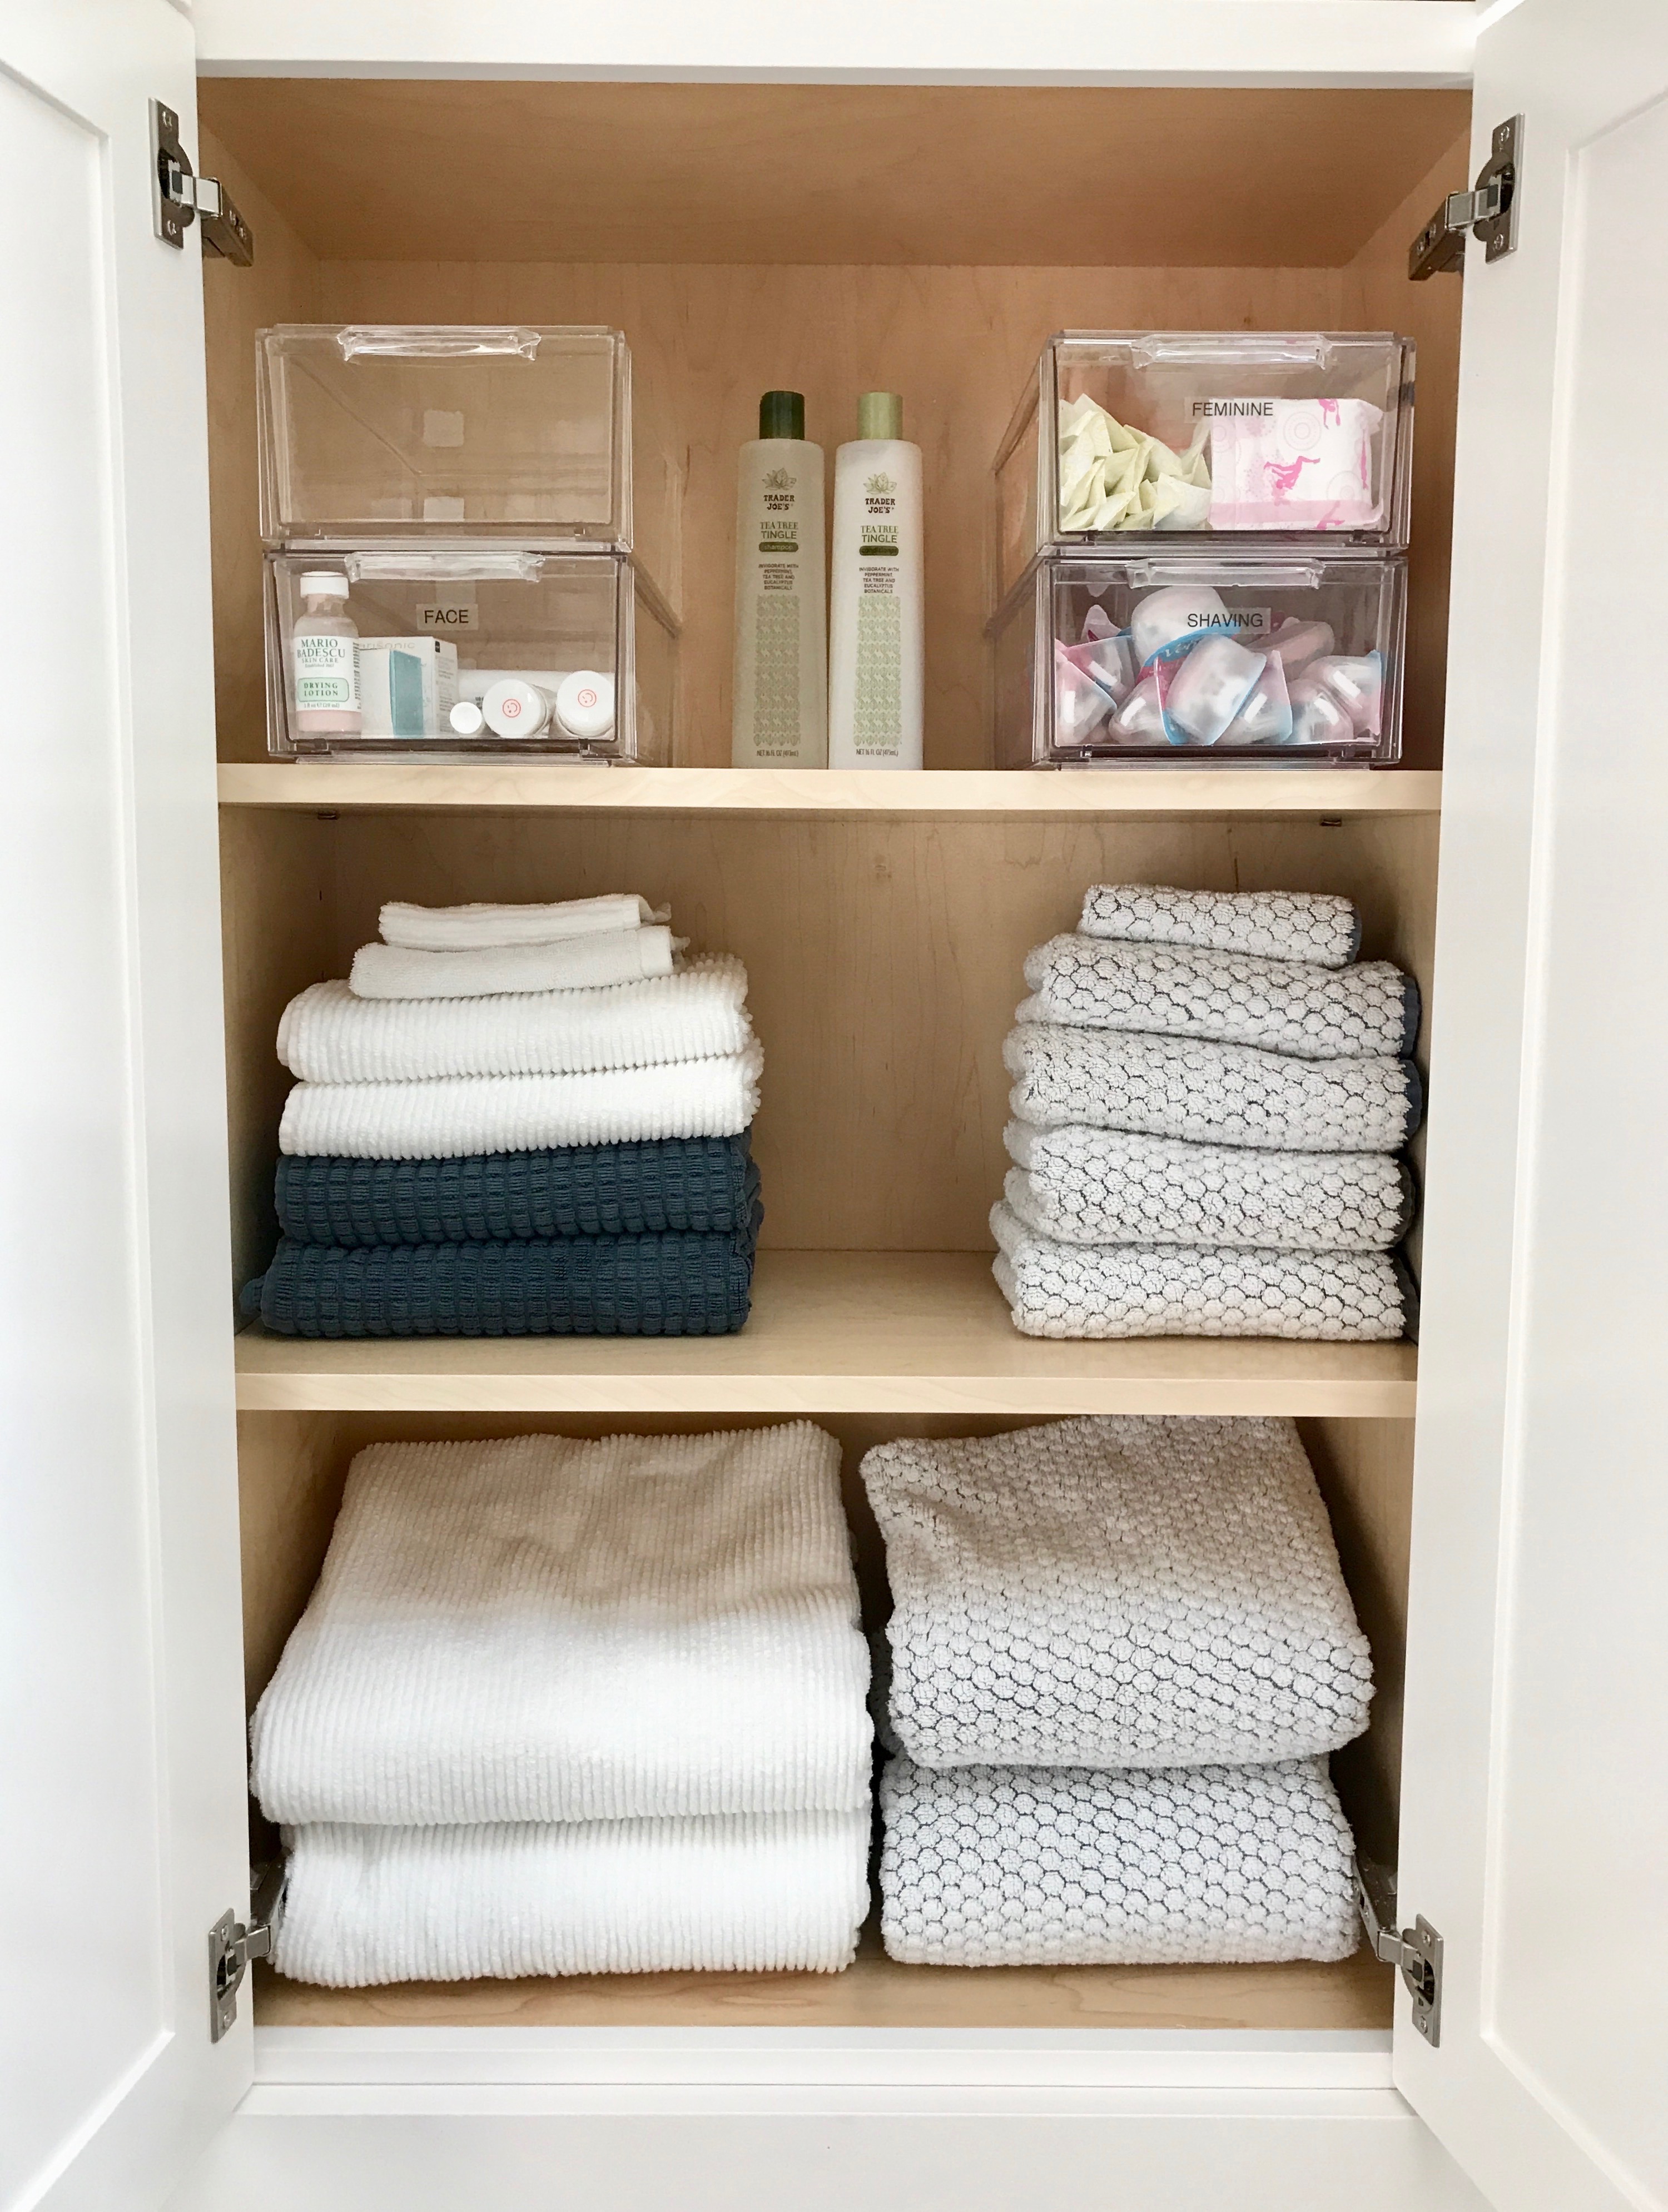
No matter the contents or stage of life, there’s room for what you need…and more than enough space to be organized.
This beautiful master bathroom for 2 was so much fun to organize. Soon enough this family of 3 becomes a family of 4. Nothing I love more than the families who hire me…except when I’m watching them grow.
SHOP THE POST
See anything you loved in this bathroom? You can shop the products I used right here…
It’s been so fun playing catch-up on projects I haven’t shared in 18+ months. There’s so much more fun to come…including some awesome new projects and events, like this coming week when I have an incredible new giveaway for you guys! Sneak peek…
Back soon you guys!
xx,
Sam
* some affiliate links were used for your convenience. you pay nothing more by clicking any link anywhere on this site. i promise! thank you for supporting this blog so that i can continue to deliver excellent, new content for you! xoxo